
While 3D printing is quick and convenient, how do you overcome the poor precision tolerances of an additively manufactured attachment point? The answer lies in using an advanced manufacturing technique called captured metal 3D printing.
I was recently reminded of my grandfather’s basement workshop. It was primarily set up for woodworking with a bit of electrical and light metalworking for good measure. Growing up, I enjoyed spending time with him in the shop because it meant we’d work on a project together and he’d let me use the power tools. One of the lessons he taught me is that every tool has its job, and that sometimes it’s better to combine tools in creative or unconventional way rather than forcing a one-size-fits-all approach.
Additive manufacturing with metal parts
At Multiscale Systems, we do a lot of advanced manufacturing, especially the use of 3D printing with carbon fiber reinforced thermoplastics. 3D printing is a great tool for prototyping and small-batch manufacturing, but it’s important to acknowledge both its strengths and weaknesses. One downside is that achieving high precision dimensional tolerances with 3D printed parts is difficult, time consuming, and ultimately not the best use of the technology.
Let’s say you need to include an attachment point to a 3D printed part, an often necessary addition. Sometimes a through-hole isn’t sufficient, so you might consider adding threads to the 3D model and printing the part fully pre-threaded. Doable, but difficult to get right without a lot of trial and error on a per-part basis.
Alternatively, how about a self-tapping screw? Well, depending on the build direction relative to the screw axis, you might end up doing more harm than good as the tapping action risks splitting the 3D printed layers apart. Not great. You could always carefully try tapping the part after completion with a standard tap-and-die, but even if the layers stay together, you’ll end up with limited pullout strength.
In contrast to these solely 3D printing-centric approaches, consider you can go to the hardware store and get a 50 pack of nuts and bolts for $5 or $10. The high-precision machining will out compete a 3D printed equivalent in terms of cost, speed, and attachment strength any day.
Drawing from the lesson my grandfather taught me years ago, sometimes the answer for achieving high-quality attachments lies in combining approaches. Luckily for us, such a method already exists: captured metal 3D printing.
What is captured metal 3D printing?
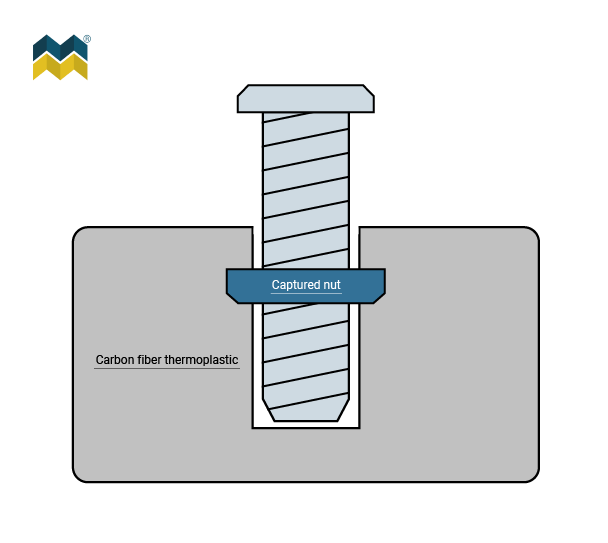
Image: An illustrated cross section of a captured nut within a 3D printed part.
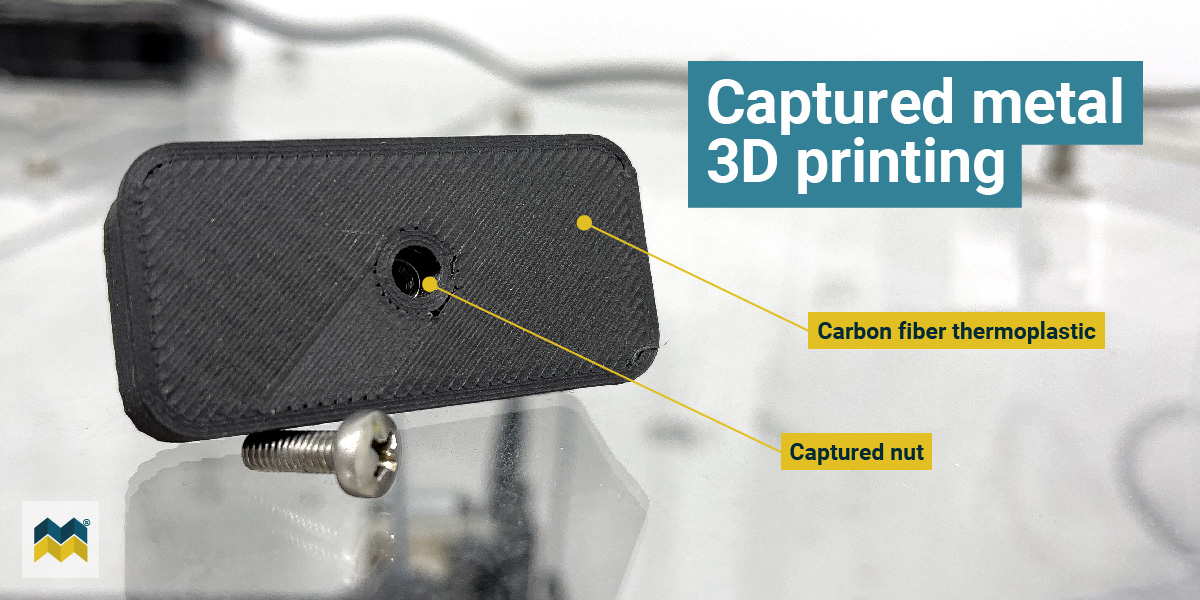
Captured metal 3D printing is a modification to the standard 3D printing process that enables a metal element, such as a bolt, to be embedded within the 3D printed part.
The part is purposefully designed to include a cavity into which the metal component will be inserted. The printing process begins as usual, but is interrupted so the metal part can be added. Printing is subsequently resumed and the metal becomes embedded. Effectively, the metal is “captured” during the 3D printing process.
A benefit of captured metal 3D printing is that the high-precision tolerances and low cost of a metal component like a nut and bolt can be combined with the high strength-to-weight of an additively manufacturing material, like carbon fiber thermoplastic. Convenience and reliability are neatly packaged within customizable 3D printed composite technology.
Problem solving with captured metal 3D printing
While the idea for capturing a metal nut in a 3D printed part has been around for a while, we recently had a project where it was the right tool for the job.
In a recent upgrade to our in-situ thermoplastic composite ply consolidation system, aka STaMPER, one of the modules was replaced to make it easier to quickly change molds. This change required installing a new load-bearing stand-off to keep everything aligned.
Instead of the all-metal approach of the previous iteration, Shawn Aalto, one of our R&D mechanical and materials engineers, opted to use captured metal 3D printing. Shawn designed a carbon fiber thermoplastic pillar with space for the appropriate nut. The nut was captured during printing, and the part was easily installed to provide the tolerances, strength, and adaptability required.
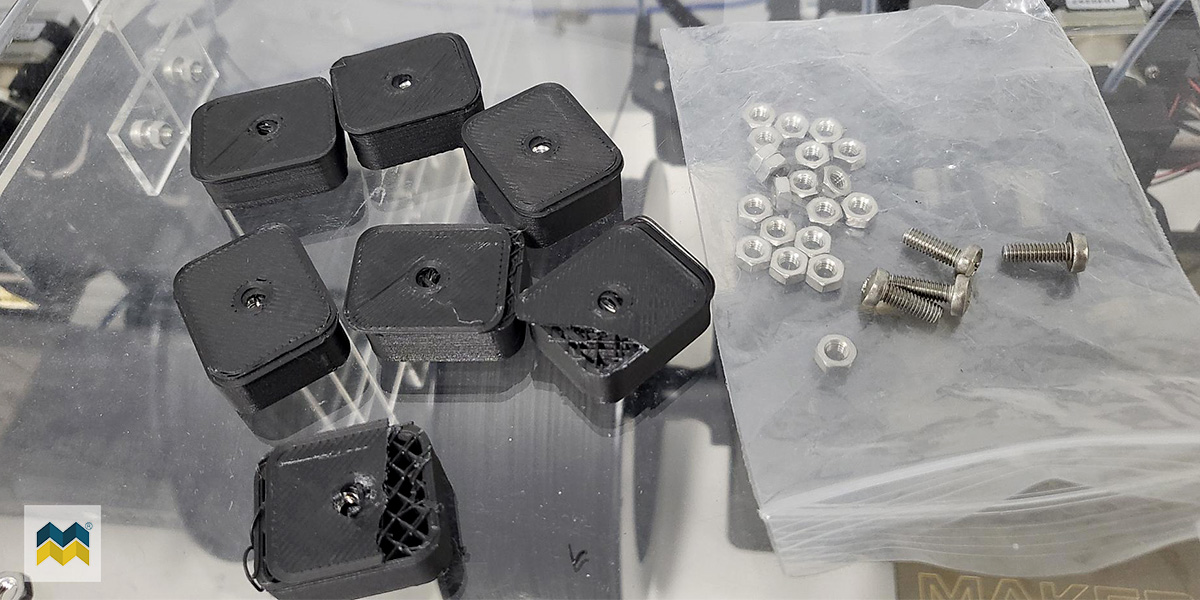
Image: Trial and error on the way to creating a captured metal 3D printed composite part.
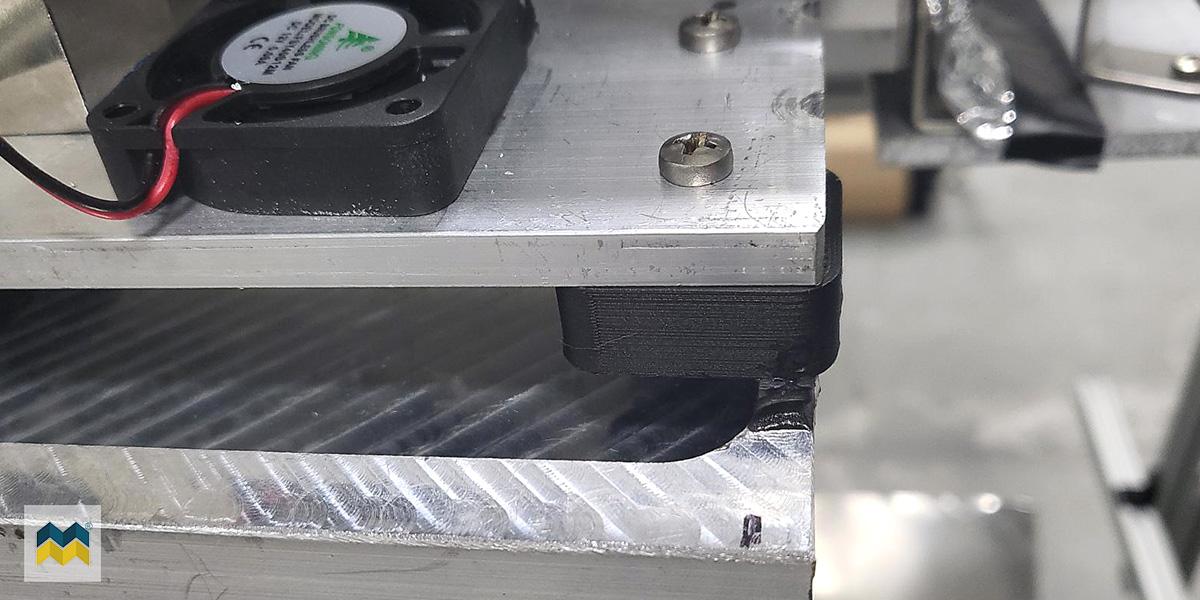
Image: The final part itself was used as a load-bearing stand-off to help modularize the mold design in STaMPER. The 3D printed part with captured metal replaces an aluminum part that would have had to be precision milled to fit.
Captured metal 3D printing is an example of Industry 4.0, offering simultaneously smart, practical, and creative solutions for real world engineering and manufacturing problems. It’s also an example of what you can expect when working with the team at Multiscale Systems. Get in touch if you’d like to learn more.
 Jesse Silverberg, Ph.D. is the CEO and Research Director at Multiscale Systems. With a background in science, writing, and public speaking, Jesse now leads Multiscale Systems toward sustainable commercial success.
Latest Lab Notes

News /
July 18, 2025—Multiscale will engineer functionally-graded alloys tailored for molten salt and liquid metal environments, leveraging its hybrid manufacturing systems to produce nuclear-grade material performance.
News /
March 11, 2025 – Multiscale Systems to showcase cutting-edge industrial innovation during StartUp Week Worcester 2025.

News /
Multiscale Systems receives Massachusetts manufacturing award in recognition of outstanding leadership skills in the manufacturing industry.

